
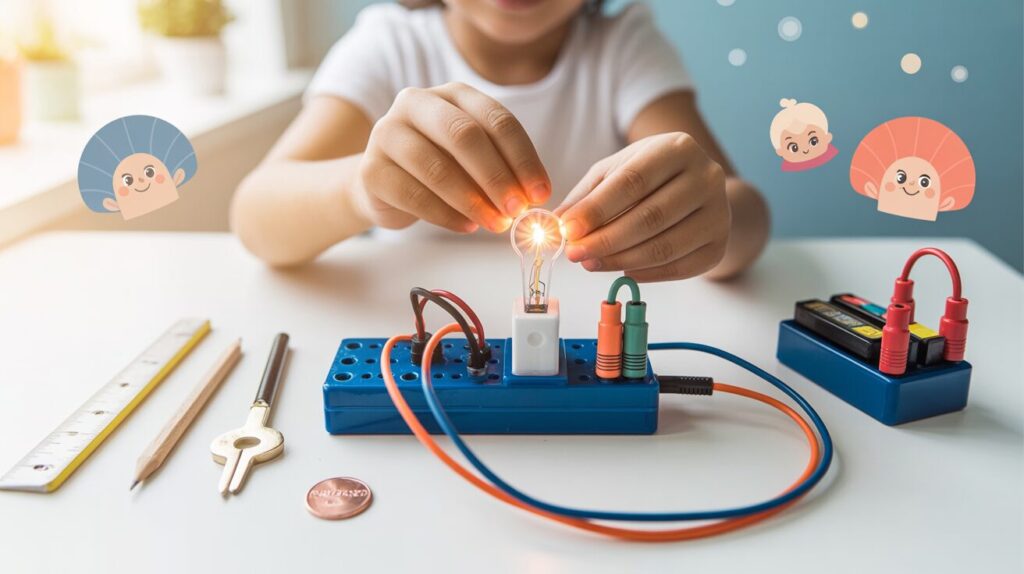
Building a Simple Electric Circuit: A Complete Guide with Safety Tips for Primary Students
December 16, 2025
Water Pollution Experiment: How to Create an Effective Homemade Water Filter
December 18, 2025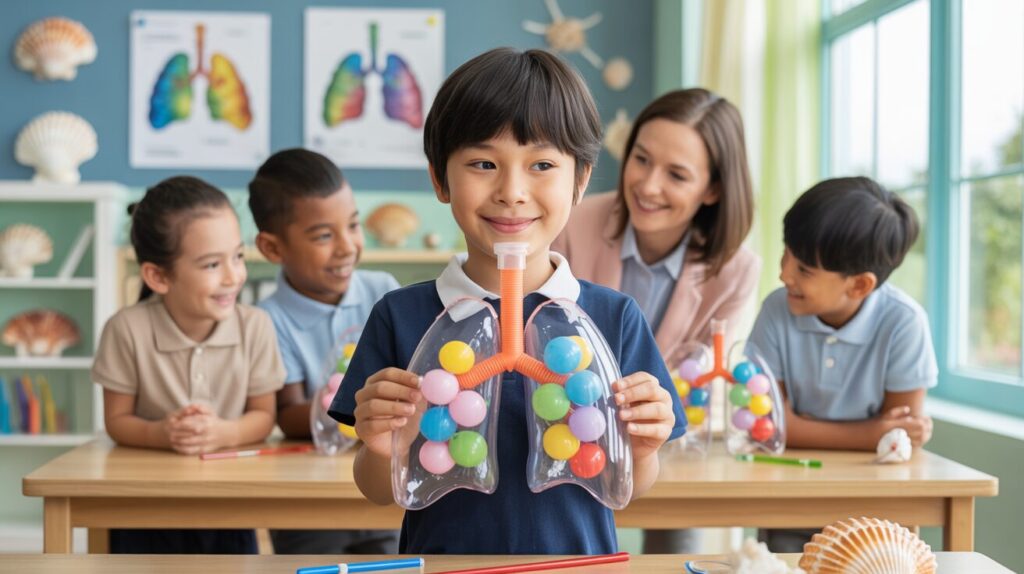
Table Of Contents
- Introduction
- Materials Needed for Your DIY Lung Model
- Step-by-Step Instructions to Build Your Lung Model
- How the Model Works: Understanding Respiratory Mechanics
- The Human Respiratory System: Key Components
- Learning Extensions and Activities
- Educational Benefits of Hands-On Science Learning
- Conclusion
DIY Lung Model: A Hands-On Activity to Understand the Respiratory System
Every breath we take involves a fascinating sequence of events within our respiratory system. For primary school students learning about human body systems, abstract concepts about how our lungs work can sometimes be difficult to visualize. At Seashell Academy by Suntown Education Centre, we believe that bringing science concepts to life through hands-on activities creates deeper understanding and lasting knowledge. This DIY lung model project offers a perfect opportunity for students to see respiratory mechanics in action using simple household materials. By building this model, students will gain insights into how the diaphragm, lungs, and breathing process work together—transforming a complex biological system into a tangible learning experience. Let’s explore how to create this educational model that makes the invisible process of breathing visible!
DIY Lung Model: Visualizing the Respiratory System
Create a simple yet effective model to understand breathing mechanics using household materials
1Materials Needed
- ✓Clear plastic bottle (1.5-2L)
- ✓Two small balloons (lungs)
- ✓One larger balloon (diaphragm)
- ✓Two straws or tubes
- ✓Y-shaped connector
- ✓Rubber bands & tape
- ✓Scissors
2Assembly Steps
- Prepare the bottle: Cut off bottom to create chest cavity
- Create airways: Attach balloons to Y-connector with rubber bands
- Insert assembly: Place through bottle neck with straw extending out
- Add diaphragm: Stretch cut larger balloon across bottle’s open bottom
- Secure connections: Ensure all joints are airtight with tape
How It Works: Respiratory Mechanics
Inhalation (Breathing In)
Pull the balloon diaphragm down → Creates negative pressure → Air rushes in through straw → Balloon lungs inflate
Exhalation (Breathing Out)
Push the balloon diaphragm up → Increases pressure inside bottle → Forces air out → Balloon lungs deflate
Key Components of the Respiratory System
Trachea
Main straw; carries air to lungs
Bronchi
Y-connector; branches to each lung
Lungs
Small balloons; where gas exchange occurs
Diaphragm
Large balloon; controls breathing
Educational Benefits of This Activity
Visualizes Abstract Concepts
Makes invisible breathing mechanics visible and tangible
Develops Scientific Skills
Promotes observation, hypothesis formation, and testing
Fosters Engagement
Creates excitement and intrinsic motivation to learn
Supports Multiple Learning Styles
Combines visual, tactile, and kinesthetic learning
Learning Extensions
Measure Lung Capacity
Count how many breaths it takes to fully inflate the model lungs
Compare Breathing Patterns
Demonstrate differences between normal, deep, and rapid breathing
Materials Needed for Your DIY Lung Model
Before embarking on this educational project, gather these simple materials that you likely already have around your home. The beauty of this model lies in its simplicity while still effectively demonstrating complex respiratory concepts.
For your DIY lung model, you will need:
- A clear plastic bottle (1.5 or 2-liter size) with the bottom cut off
- Two small balloons (representing the lungs)
- One larger balloon (representing the diaphragm)
- Two straws or small plastic tubes
- A Y-shaped connector (you can use modeling clay to connect three short straw pieces)
- Rubber bands
- Tape (clear packing tape works best)
- Scissors
Optional decorative materials include colored markers, labels, or construction paper if you’d like to identify different parts of the respiratory system on your model. Having these materials ready before starting will make the building process smoother and more enjoyable for young scientists.
Step-by-Step Instructions to Build Your Lung Model
Creating your working lung model involves several straightforward steps. Follow these instructions carefully, and soon you’ll have a functioning model that demonstrates the mechanics of breathing.
Preparing the Bottle
Start by carefully cutting off the bottom of your plastic bottle. This will create the chamber that represents your chest cavity. Ensure the cut is even and smooth to prevent any sharp edges. The bottle should remain upright with the cap at the top. If needed, cover the cut edge with tape to make it safer for young hands.
Creating the Airways and Lungs
Take your two small balloons and stretch them a few times to make them more pliable. These will represent your lungs. Next, create your airway system:
1. If using a ready-made Y-connector, attach the two straws to the branching ends.
2. If making your own connector, use three short pieces of straw and modeling clay to form a Y-shape.
3. Carefully attach one small balloon to the end of each of the branching straws using rubber bands. Make sure the connection is airtight.
4. Test your lung assembly by blowing gently through the main straw—both balloons should inflate slightly.
Assembling the Model
Now it’s time to bring all the components together:
1. Insert your balloon-straw assembly through the neck of the bottle, with the main straw extending through the bottle cap. You may need to drill or cut a small hole in the cap to allow the straw to pass through.
2. Secure the straws in place with tape or modeling clay to create an airtight seal around the bottle opening.
3. Take your larger balloon and cut it across to make a flat sheet of rubber.
4. Stretch this balloon piece over the cut bottom of the bottle and secure it tightly with rubber bands or tape. This represents your diaphragm.
Your lung model is now complete! Before moving on to experiments, check that all connections are secure and that the model is stable when standing upright.
How the Model Works: Understanding Respiratory Mechanics
Now comes the exciting part—seeing your DIY lung model in action! This model demonstrates the principle of air pressure and how our diaphragm works to facilitate breathing.
Demonstrating Inhalation
To show inhalation (breathing in), gently pull down on the balloon diaphragm at the bottom of your model. As you pull, observe what happens to the small balloons inside the bottle. They should inflate! This occurs because when you pull down the diaphragm, you increase the volume inside the bottle chamber. This creates negative pressure (lower pressure than the surrounding air), which draws air through the straw and into the lung balloons.
In our bodies, this is exactly what happens when our diaphragm contracts and moves downward—it creates negative pressure in our chest cavity, causing air to rush into our lungs.
Demonstrating Exhalation
For exhalation (breathing out), push the balloon diaphragm upward, back into the bottle. Notice how the lung balloons deflate as you do this. By pushing the diaphragm up, you’re decreasing the volume inside the bottle chamber, which increases the air pressure. This forces air out of the lung balloons and through the straw.
Similarly, when our diaphragm relaxes and moves upward, it reduces our chest cavity volume, increasing pressure and pushing air out of our lungs. This simple demonstration helps students visualize this invisible but vital process that occurs approximately 20,000 times daily in the human body!
The Human Respiratory System: Key Components
While our model offers a simplified view of breathing mechanics, the actual human respiratory system is a marvel of biological engineering. Understanding these components helps students connect the model to their own bodies.
Main Parts of the Respiratory System
The respiratory system consists of several important structures:
Nose and Mouth: These are the entry points for air. The nose filters, warms, and moistens the air before it travels deeper into the system.
Trachea (Windpipe): Represented by the main straw in our model, the trachea is the tube that carries air from the throat to the bronchi.
Bronchi and Bronchioles: The Y-shaped connector in our model represents how the trachea divides into two main bronchi, which further branch into smaller bronchioles within each lung.
Lungs: Our balloon lungs represent these spongy, air-filled organs where oxygen and carbon dioxide exchange takes place.
Diaphragm: The large balloon at the bottom of our model represents this dome-shaped muscle that separates the chest cavity from the abdominal cavity. Its contraction and relaxation are essential for breathing.
In actual lungs, the exchange of gases occurs in tiny air sacs called alveoli, which are surrounded by capillaries. This is where oxygen enters the bloodstream and carbon dioxide is removed—a microscopic process that our model doesn’t show but is fascinating to discuss with students.
Learning Extensions and Activities
At Seashell Academy by Suntown Education Centre, we encourage extending learning beyond the basic model through additional activities that deepen understanding and critical thinking. Here are some ways to enhance this respiratory system lesson:
Scientific Observations and Experiments
Turn model-building into a full scientific investigation with these activities:
1. Measuring Lung Capacity: Count how many breaths (pulls of the diaphragm) it takes to fully inflate the lung balloons from a completely deflated state.
2. Comparing Breathing Rates: Use the model to demonstrate the difference between normal breathing, deep breathing, and rapid breathing.
3. Journal Observations: Have students keep a science journal where they draw the model, label all parts, and record their observations about how changes to the model affect its function.
Connecting to Human Health
Help students make connections between the model and respiratory health:
1. Discuss how respiratory illnesses like asthma might affect the breathing process. You could simulate restricted airways by partially pinching the straws.
2. Explain the importance of exercise for lung health and capacity.
3. Create a mind map connecting the respiratory system to other body systems, such as how the circulatory system works with the respiratory system to transport oxygen throughout the body.
These extension activities align perfectly with our Programme Philosophy at Seashell Academy, where we emphasize the application of knowledge beyond textbooks and exams.
Educational Benefits of Hands-On Science Learning
Projects like the DIY lung model exemplify why hands-on learning is so valuable in science education, particularly for primary school students. At Seashell Academy by Suntown Education Centre, we incorporate these experiential learning approaches across our curriculum, including our Mathematics Programme.
Building Conceptual Understanding
When students build and manipulate a physical model, abstract concepts become concrete. The invisible process of breathing becomes visible and tangible. This three-dimensional learning helps students who might struggle with textbook descriptions to grasp important scientific principles through direct observation.
Developing Scientific Skills
Creating a working model involves several key scientific skills:
1. Following procedures in a specific sequence
2. Making observations about cause and effect
3. Forming hypotheses about how changes might affect the system
4. Drawing conclusions based on evidence
These foundational skills are valuable across all areas of science education and are emphasized in our approach to teaching Science, Chinese, and Mathematics at Seashell Academy.
Fostering Curiosity and Engagement
Hands-on activities naturally spark curiosity and questions. Students who build their own lung models often become genuinely interested in how their actual lungs work. This intrinsic motivation is far more powerful than memorization for exams. The excitement of seeing their model work can inspire further questions about the respiratory system and human biology.
This approach aligns perfectly with our educational philosophy at Seashell Academy, where we nurture not just academic excellence but a genuine love for learning through our unique Seashell Method. We find that students in our P4 Chinese Programme, P5 Chinese Programme, and P6 Chinese Programme benefit equally from hands-on learning approaches that make abstract concepts concrete.
Conclusion
Creating a DIY lung model offers an invaluable opportunity for primary school students to visualize and understand the fascinating mechanics of the respiratory system. Through this hands-on project, abstract concepts transform into tangible learning experiences that help students connect classroom knowledge with the real-world functioning of their own bodies.
At Seashell Academy by Suntown Education Centre, we believe that this type of experiential learning creates deeper understanding and retention than textbook learning alone. The process of building, testing, and experimenting with a lung model engages multiple learning styles and encourages scientific thinking skills that extend far beyond this single activity.
We encourage parents and students to approach this project with curiosity and a spirit of investigation. Don’t worry about creating a perfect model—the learning happens in the process, questions, and discoveries along the way. As students observe how changing the volume inside their model affects the balloon lungs, they’re developing insights about their own breathing that can spark a lifetime of interest in human biology.
This DIY lung model project exemplifies our commitment to nurturing not just academic excellence, but also fostering a genuine love for learning through engaging, meaningful educational experiences. By connecting scientific concepts to hands-on activities, we help students develop the confidence, curiosity, and critical thinking skills that will serve them well in their educational journey and beyond.
Want to learn more about how Seashell Academy by Suntown Education Centre incorporates hands-on learning into our holistic education approach? Discover how our unique Seashell Method can help your child develop a genuine love for learning while achieving academic excellence. Contact us today to schedule a consultation or learn more about our programmes!


