
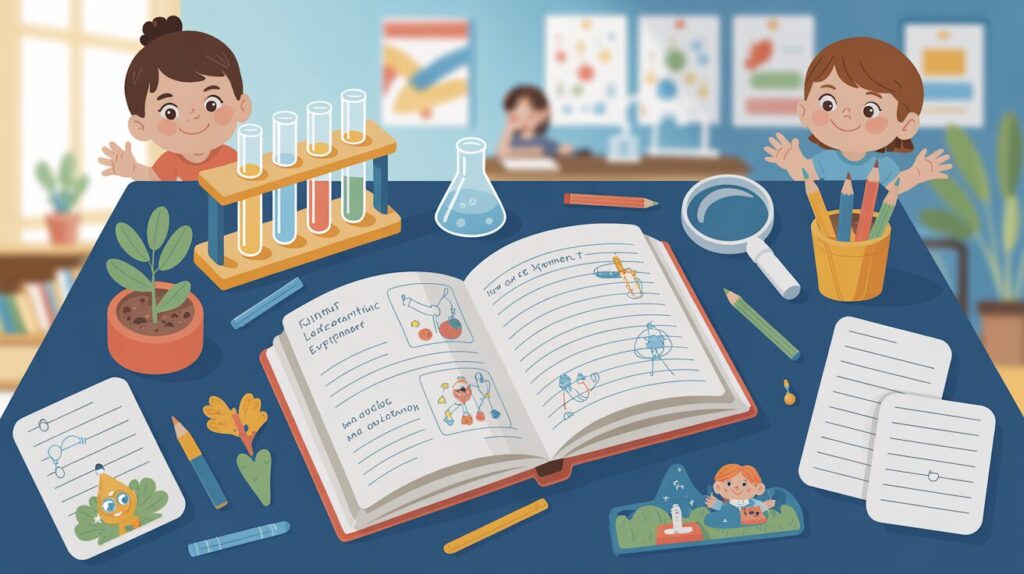
Experiment Logbook Template & How to Use It: A Complete Guide for Primary Students
December 24, 2025
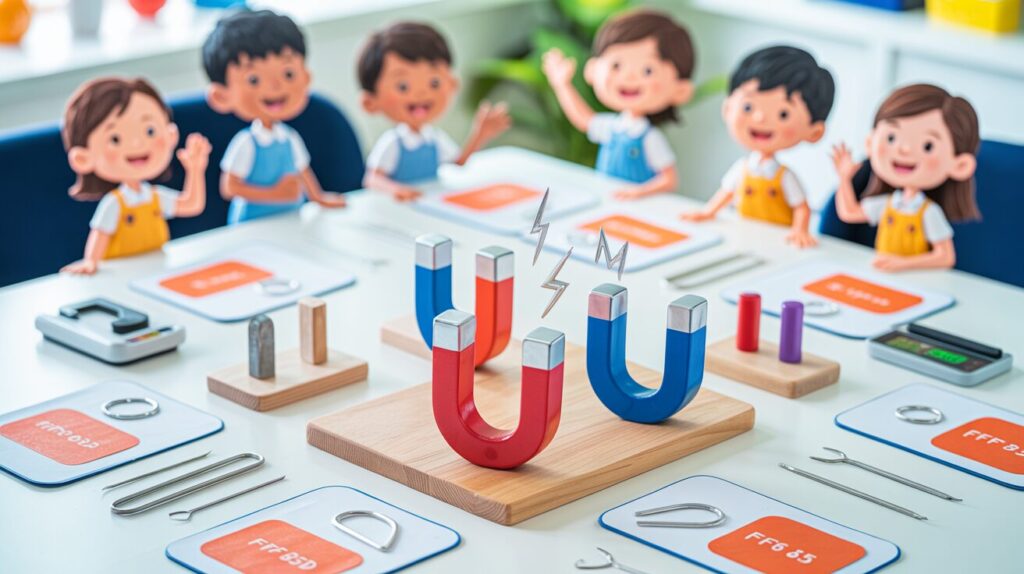
Magnet Strength Investigation: A Complete Guide to Changing Variables for Primary Students
December 26, 2025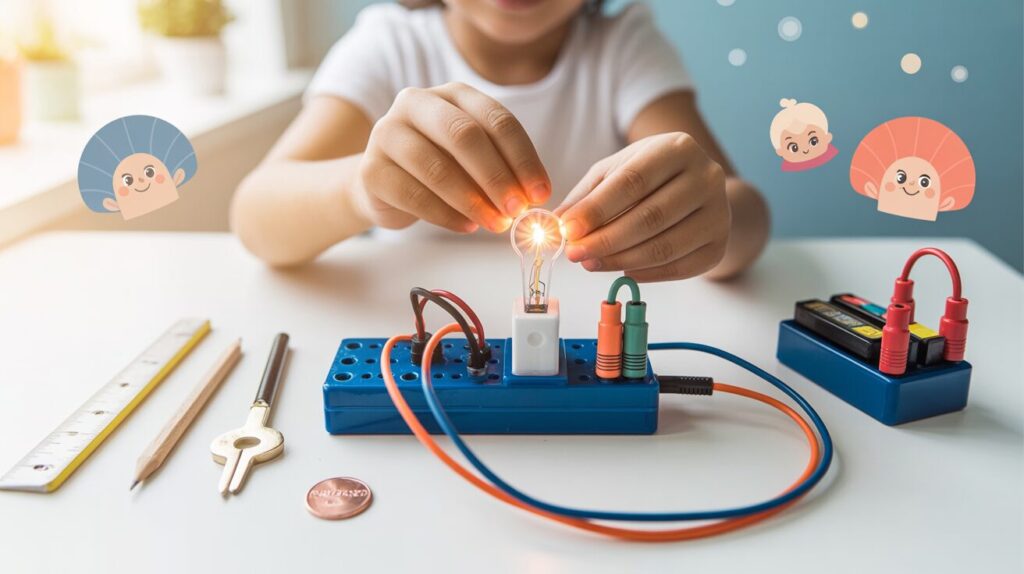
Table Of Contents
When your Primary 4, 5, or 6 child encounters the topic of electricity in their Science curriculum, the concepts of electrical conductors and insulators can seem abstract and challenging. Yet, this foundational knowledge forms a critical part of understanding how electricity works in our everyday lives—from the phones we use to the appliances in our homes.
At Seashell Academy by Suntown Education Centre, we believe that science comes alive when children can touch, test, and discover concepts for themselves. Rather than simply memorizing that metals conduct electricity while plastics don’t, students who engage with hands-on test kits develop a deeper, more intuitive understanding that stays with them long after examinations end.
This comprehensive guide will walk you through everything you need to know about electrical conductors and insulators test kits—from understanding the basic science principles to building your own kit at home, conducting safe experiments, and interpreting results. Whether you’re a parent supporting your child’s learning journey or an educator looking for practical teaching tools, you’ll discover how this simple yet powerful educational resource can transform abstract concepts into confident knowledge.
Electrical Conductors & Insulators Test Kit
Your Complete Guide to Hands-On Primary Science Learning
What Are They?
Conductors allow electricity to flow easily (metals like copper, aluminum)
Insulators resist electricity flow (plastic, rubber, wood)
Why Use a Test Kit?
Hands-on learning creates stronger retention and builds scientific thinking skills through direct experimentation
Essential Test Kit Components
Battery
1.5V-3V power source
Light Bulb
Visual indicator
Wires & Clips
Alligator clips for easy testing
Test Materials
Various everyday items
5-Step Testing Procedure
Make a Prediction
Ask your child to predict if the material will conduct electricity
Position the Material
Place the test object on a non-conductive surface
Attach Alligator Clips
Connect clips to different parts of the material
Observe the Bulb
Bright light = conductor, no light = insulator
Record Results
Document predictions vs. actual outcomes in a chart
✓ Good Conductors
- Metal coins, keys, spoons
- Aluminum foil
- Paper clips
- Graphite (pencil lead)
- Copper wire
✗ Insulators
- Plastic rulers, bottles
- Rubber bands, erasers
- Wooden items
- Paper and cardboard
- Fabric and cloth
🎯 Learning Benefits
✨ Stronger retention through hands-on experience
🧠 Develops critical thinking skills
🎓 Builds confidence in science
🔬 Nurtures scientific curiosity
💡 Pro Tip: Start with clearly different materials (metal vs. plastic) before testing ambiguous items. This builds confidence and establishes clear patterns for deeper learning.
Understanding Electrical Conductors and Insulators
Before diving into test kits, it’s essential to establish a clear understanding of what conductors and insulators actually are. Electrical conductors are materials that allow electricity to flow through them easily, while electrical insulators are materials that resist or block the flow of electricity. Think of conductors as open highways where cars (electric charges) can move freely, and insulators as roadblocks that prevent movement.
In the Primary Science curriculum, students learn that this property isn’t random—it’s determined by the atomic structure of materials. Metals like copper, aluminum, and iron are excellent conductors because their atoms have loosely held electrons that can move freely. Non-metals like plastic, rubber, and wood are typically insulators because their electrons are tightly bound to their atoms. This fundamental principle explains why electrical wires have a metal core (to carry electricity) wrapped in plastic coating (to keep us safe from electric shock).
Understanding these concepts through direct experimentation helps children develop scientific thinking skills that extend far beyond memorization. When they predict which materials will conduct electricity, test their hypotheses, and observe the results, they’re engaging in the same process that scientists use to discover new knowledge. This aligns perfectly with our programme philosophy at Seashell Academy, where we emphasize real-life application and critical thinking alongside academic mastery.
Why Use a Test Kit for Learning?
You might wonder why a simple test kit matters when textbooks already explain conductors and insulators clearly. The answer lies in how children actually learn and retain information. Educational research consistently shows that hands-on experimentation creates stronger neural connections than passive reading or listening. When your child physically touches materials, makes predictions, and sees immediate results through a lighting bulb or buzzer, they’re engaging multiple senses and cognitive processes simultaneously.
A test kit also transforms learning from a solitary, pressure-filled activity into an interactive discovery experience. Children naturally become more engaged when they can control variables, make choices, and see tangible outcomes. This gamified approach to learning—where experimentation feels more like play than study—reduces anxiety and builds genuine curiosity about scientific principles. At Seashell Academy, we’ve observed that students who engage with practical science activities demonstrate not only better concept retention but also increased confidence in tackling challenging exam questions.
Additionally, test kits help address common misconceptions before they become ingrained. Many students assume that all shiny objects conduct electricity or that all rough materials are insulators. By testing diverse materials themselves, they develop nuanced understanding based on evidence rather than assumptions. This critical thinking skill—questioning assumptions and seeking proof—serves them well across all academic subjects and in real-world problem-solving situations.
Essential Components of Your Test Kit
A well-designed electrical conductors and insulators test kit doesn’t need to be complicated or expensive. In fact, simplicity often works best for Primary Science learning because students can clearly see how each component contributes to the circuit. Understanding what each part does helps demystify electricity and builds foundational knowledge for more advanced concepts they’ll encounter in secondary school.
Core Electrical Components
Battery or battery holder: The power source provides the electrical energy needed to test materials. For primary students, 1.5V AA batteries or a 3V battery pack work perfectly. These voltages are safe for handling while providing enough power to produce visible results. Battery holders with wire leads make connections easier and reduce frustration during experiments.
Light bulb and bulb holder: The indicator that shows whether electricity is flowing through a circuit. When testing conductors, the bulb lights up; with insulators, it remains dark. Small flashlight bulbs (1.5V to 3V) mounted in screw-base holders work reliably and are easy for children to observe. Some test kits use LED bulbs, which are brighter and more energy-efficient, though traditional incandescent bulbs help students understand the heating effect of electric current.
Connecting wires with alligator clips: These form the pathways for electricity to travel from the battery, through the test material, to the bulb, and back to the battery. Alligator clips (those metal clips that look like tiny jaws) are essential because they allow students to easily attach and detach test materials without fumbling with bare wire ends. Choose wires with different colors to help children distinguish between different parts of the circuit.
Optional Enhancement Components
While not essential, these additional components can enrich the learning experience:
- Buzzer: Provides an auditory signal in addition to or instead of the light bulb, which can be especially engaging for younger learners
- Switch: Allows students to control when electricity flows, teaching them about circuit control and adding an interactive element
- Multimeter: For advanced learners, this tool measures electrical resistance and helps quantify differences between conductors
- Circuit board or cardboard base: Provides a stable working surface and helps organize components neatly
How to Build Your Own Test Kit
Creating a test kit at home offers excellent bonding time with your child while saving money compared to purchasing commercial kits. The building process itself becomes a valuable learning experience, as children see how individual components connect to form a working circuit. This hands-on construction reinforces the relationship between theoretical knowledge and practical application—a cornerstone of our approach at Seashell Academy.
Materials You’ll Need
- 2-3 AA batteries (1.5V each) or one 3V battery
- Battery holder with wire leads
- 1 small light bulb (matching battery voltage)
- Bulb holder or socket
- 3-4 insulated wires (approximately 20cm each) with alligator clips
- Small screwdriver (if needed for terminals)
- Cardboard or wooden base (optional but helpful)
- Tape or glue for securing components (optional)
Step-by-Step Assembly Instructions
1. Prepare your workspace – Choose a clean, well-lit table where your child can work comfortably. Lay out all components so they can see everything they’ll be using. This organization reduces confusion and helps children feel confident about the task ahead.
2. Insert batteries into the holder – Show your child how to match the + and – symbols on the batteries with the markings inside the holder. This teaches them about polarity, an important electrical concept. Ensure batteries are fresh to avoid weak signals that might confuse results.
3. Connect the first wire to the battery holder – Attach one alligator clip to the positive (+) wire coming from the battery holder. If your battery holder has screw terminals instead of wire leads, use the screwdriver to loosen the terminal, insert the bare wire end, and tighten securely. This wire will eventually connect to one side of the test material.
4. Install the bulb in its holder – Gently screw the bulb into the holder, being careful not to overtighten. Explain to your child that the bulb is fragile and needs gentle handling—a good lesson in careful experimentation.
5. Create the circuit pathway – Connect a second wire from the negative (-) terminal of the battery holder to one terminal of the bulb holder. Then connect a third wire from the other terminal of the bulb holder. This wire will connect to the other side of the test material. You now have a circuit with a gap—the testing gap where materials will be inserted.
6. Test the circuit before using it – Touch the two free alligator clips together. The bulb should light up, confirming that your circuit works properly. If it doesn’t light, systematically check each connection, ensure the batteries are properly inserted, and verify the bulb hasn’t burned out. This troubleshooting process teaches valuable problem-solving skills.
7. Secure components to a base (optional) – For younger children or repeated use, gluing or taping the battery holder and bulb holder to a cardboard or wooden base prevents components from moving around during testing. Leave the wires with alligator clips free to move.
Conducting Safe and Effective Tests
Once your test kit is assembled, the real learning begins. However, the quality of this learning depends on how systematically and safely you approach the experimentation process. At Seashell Academy, we teach students that good science isn’t just about getting results—it’s about following proper procedures, making careful observations, and drawing evidence-based conclusions.
Safety Guidelines
While the low voltages used in these test kits are generally safe, establishing good safety habits now prepares children for more advanced electrical work in the future:
- Adult supervision: Always have an adult present during experiments, especially with younger primary students
- Dry hands: Ensure hands are completely dry before handling any electrical components, as water conducts electricity
- Battery safety: Never short-circuit batteries by connecting the positive and negative terminals directly without a bulb or resistor in between, as this can cause batteries to overheat
- No household electricity: Only use batteries—never attempt to test materials using wall outlets or mains electricity
- Eye protection: While unlikely with low-voltage circuits, wearing safety glasses establishes good laboratory habits
- Material safety: Avoid testing sharp objects, very thin materials that might break, or anything wet
Testing Procedure
1. Make a prediction – Before testing each material, ask your child to predict whether it will conduct electricity or act as an insulator. Encourage them to explain their reasoning. This prediction step activates prior knowledge and makes the results more meaningful. Record predictions in a simple table or notebook.
2. Position the test material – Place the object to be tested on a non-conductive surface like a plastic tray or wooden table. Ensure it’s not touching other materials that might interfere with results.
3. Attach the alligator clips – Clip one alligator clip to one end of the test material and the second clip to the other end. For small items like coins or paper clips, ensure the clips are attached to different parts of the object, not touching each other. For materials like fabric or paper, clips should be at least a few centimeters apart.
4. Observe the bulb carefully – Does it light up brightly, dimly, or not at all? A bright light indicates a good conductor, a dim light suggests a poor conductor (or a dirty connection), and no light indicates an insulator. Give the bulb a few seconds to respond, as some materials may take a moment to show results.
5. Record your results – Have your child write down or draw what happened. Creating a simple chart with columns for “Material,” “Prediction,” “Actual Result” (Conductor/Insulator), and “Observations” helps organize thinking and makes patterns easier to spot later.
6. Disconnect and move to the next test – Remove the alligator clips from the test material before selecting the next object. This prevents accidental short circuits and teaches methodical habits.
Common Materials to Test
The beauty of an electrical test kit lies in its versatility—countless everyday objects can become subjects of scientific investigation. We recommend starting with materials that clearly demonstrate the conductor-insulator distinction, then progressing to more ambiguous cases that challenge assumptions and deepen understanding. This scaffolded approach aligns with our structured learning plans that build confidence through progressive mastery.
Excellent Conductors (Bulb Will Light Brightly)
- Metal objects: Coins, keys, aluminum foil, steel spoons, paper clips, brass fasteners, copper wire
- Graphite: Pencil lead (the “lead” in pencils is actually graphite, a form of carbon)
- Why they conduct: These materials have free electrons that can move easily through the atomic structure, creating an electrical current
Clear Insulators (Bulb Will Not Light)
- Plastics: Plastic rulers, bottle caps, pens (the plastic body, not metal clip), food containers
- Rubber: Erasers, rubber bands, balloons
- Wood: Wooden rulers, popsicle sticks, pencils (the wooden part)
- Paper and cardboard: Notebook paper, cardboard pieces, paper towels
- Fabric: Cotton cloth, felt, wool
- Glass: Glass marbles, clean glass pieces (handle carefully)
- Why they insulate: These materials have tightly bound electrons that cannot move freely to carry electrical current
Interesting Cases for Discussion
Human body: With adult supervision and using only battery power, children can test whether holding the alligator clips in opposite hands lights the bulb (it typically won’t or will only glow very dimly). This demonstrates that while the human body can conduct electricity, it’s a poor conductor compared to metals. This real-world connection makes the abstract concept of electrical resistance more concrete.
Wet materials: Test a dry piece of paper (insulator), then dampen it and test again (may conduct weakly). This shows that water can change a material’s electrical properties—an important safety lesson about not mixing water and electricity.
Dirty vs. clean coins: A tarnished coin may conduct less efficiently than a clean one, introducing the concept that surface conditions matter. This can lead to discussions about why electrical contacts need to be kept clean.
Troubleshooting Common Issues
Even well-constructed test kits sometimes produce unexpected results, and these moments offer valuable teaching opportunities. Rather than viewing problems as frustrations, frame them as puzzles to solve together. This resilience-building approach reflects our commitment at Seashell Academy to nurturing confident learners who view challenges as growth opportunities rather than obstacles.
Bulb Doesn’t Light With Known Conductors
Possible causes and solutions:
- Dead batteries: Replace batteries with fresh ones. Teach your child to test batteries by touching the alligator clips directly together—if the bulb lights brightly, batteries are fine
- Loose connections: Check that all wire ends are firmly attached to terminals and that alligator clips are making good contact with test materials
- Burned-out bulb: Examine the bulb’s filament (the tiny wire inside). If it’s broken, replace the bulb
- Corroded battery contacts: Clean battery terminals with a dry cloth or fine sandpaper if you see white or green deposits
Bulb Lights Dimly With Good Conductors
Possible explanations:
- Weak batteries: Even if batteries aren’t completely dead, low charge produces dim lighting
- Poor contact points: Oxidized or dirty surfaces on test materials can increase resistance. Clean metal objects before testing
- Long wire lengths: Very long wires add resistance to the circuit. Keep wires reasonably short (20-30cm works well)
- Bulb voltage mismatch: Using a 3V bulb with a 1.5V battery will produce dim light. Match bulb voltage to battery voltage
Inconsistent Results With Same Material
Sometimes testing the same material multiple times produces different results. This frustrating situation actually offers an excellent lesson in experimental consistency and the importance of controlling variables. Check that the alligator clips are attaching to the same locations on the material each time, the material isn’t flexing or breaking contact, and the battery charge hasn’t depleted between tests. Document these variations and discuss why consistency matters in scientific experiments.
Taking Learning Beyond the Basics
Once your child has mastered basic conductor and insulator identification, you can extend the learning in ways that deepen scientific thinking and connect to other curriculum areas. These extensions transform a simple test kit into a gateway for broader scientific literacy and critical thinking—skills that support success across all subjects, from Primary 4 through Primary 6 and beyond.
Comparative Testing and Data Analysis
Challenge your child to test 20 different materials and categorize them into conductors and insulators. Then analyze the data together: How many were conductors versus insulators? What patterns did they notice? Are all metals conductors? Are all non-metals insulators? Creating simple bar graphs or pie charts to represent their findings integrates mathematics with science, reinforcing the interconnected nature of knowledge that we emphasize in our holistic curriculum at Seashell Academy.
Real-World Applications Investigation
Take a walk around your home together and identify where conductors and insulators are used intentionally. Why do electrical cords have plastic coating? Why are pot handles made of wood or plastic while the pot itself is metal? Why are electricians’ tools covered with rubber grips? This real-world connection transforms abstract knowledge into practical understanding and helps children see science as relevant to their daily lives rather than just exam content.
Design Challenges
Ask your child to design a simple device using their knowledge of conductors and insulators. For example, can they create a “burglar alarm” that sounds a buzzer when someone opens a door? Or design a “moisture detector” that lights up when soil needs watering? These open-ended challenges develop creativity, problem-solving skills, and the confidence to apply knowledge in novel situations—exactly the kind of resilient, independent thinking that prepares students for success beyond examinations.
Connecting to the Full Electricity Topic
The conductors and insulators test kit naturally leads into other electricity concepts in the Primary Science curriculum. Use the kit to explore series versus parallel circuits, investigate what happens when you add more bulbs or batteries, or examine how switches control electrical flow. This progressive deepening of understanding builds strong conceptual foundations that make advanced secondary school physics much more accessible.
At Seashell Academy, we’ve seen how students who engage deeply with hands-on science activities develop not just better exam scores but genuine scientific curiosity. They start asking “why” and “what if” questions that drive their own learning forward. This intrinsic motivation—this love of learning for its own sake—is the most valuable outcome of educational experiences like working with electrical test kits.
An electrical conductors and insulators test kit represents far more than a collection of batteries, wires, and bulbs. It’s a gateway to scientific thinking, a tool for building confidence, and a bridge between abstract concepts and tangible understanding. When your child predicts, tests, observes, and analyzes results, they’re not just preparing for Primary Science examinations—they’re developing critical thinking skills, resilience in the face of unexpected results, and the kind of curious, questioning mindset that characterizes lifelong learners.
Whether you purchase a ready-made kit or build one together at home, the hands-on experience of testing materials transforms electricity from a mysterious force into an understandable phenomenon governed by clear principles. The light bulb that glows—or doesn’t—provides immediate, honest feedback that no textbook can match. And the discussions that emerge from these experiments create meaningful learning moments that strengthen both understanding and the parent-child bond.
At Seashell Academy by Suntown Education Centre, we believe in nurturing the whole child—building not just academic knowledge but emotional resilience, practical skills, and genuine love for learning. An electrical test kit embodies this philosophy perfectly: it combines structured learning with exploratory play, supports individual discovery while inviting collaborative discussion, and makes abstract curriculum content concrete and memorable. As your child progresses through their primary school journey, these hands-on experiences form the foundation for deeper scientific understanding and the confidence to tackle increasingly complex challenges with curiosity rather than anxiety.
Help Your Child Develop Confidence in Science and Beyond
At Seashell Academy by Suntown Education Centre, we combine hands-on learning, mind-mapping techniques, and personalized coaching to help Primary students master Science, Mathematics, and Chinese. Our Seashell Method nurtures not just academic excellence but emotional well-being and a genuine love for learning.


