
Electrical Conductors & Insulators Test Kit Guide for Primary Science Students
December 25, 2025
Circulatory System Model Using Straws & Balloons: A Complete STEM Guide for Primary Students
December 28, 2025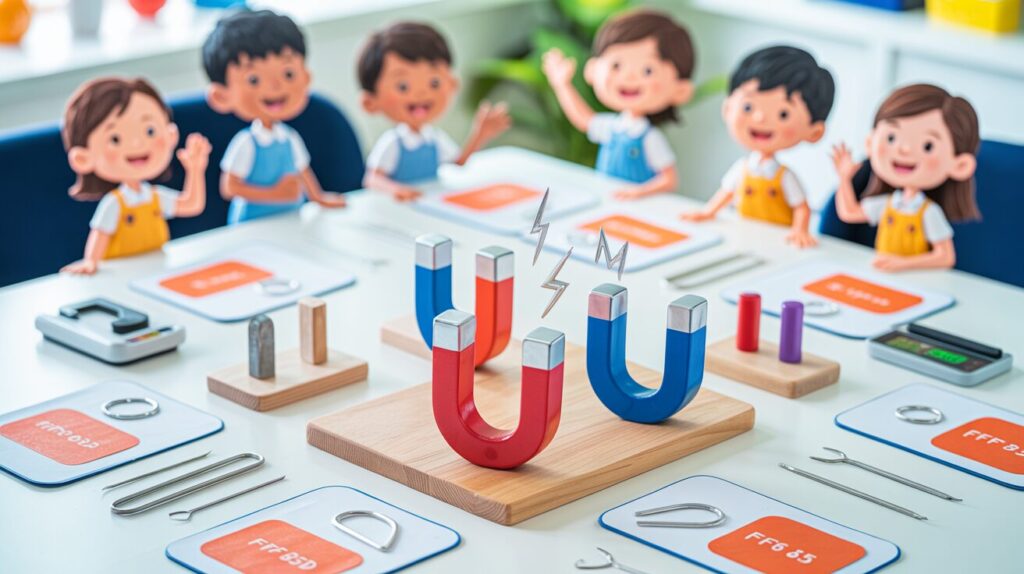
Table Of Contents
- What Is Magnet Strength and Why Does It Matter?
- Understanding Variables in Science Investigations
- Experiment 1: How Distance Affects Magnet Strength
- Experiment 2: Testing Different Material Thicknesses
- Experiment 3: Comparing Different Magnet Sizes
- Experiment 4: Stacking Magnets Together
- How to Record and Analyze Your Results
- Real-World Applications of Magnet Strength
- Common Mistakes to Avoid
Have you ever wondered why some magnets can pick up heavy objects while others barely hold a single paper clip? Understanding magnet strength isn’t just fascinating—it’s a fundamental concept in the Primary 4-6 Science syllabus that appears regularly in examinations and real-world applications.
At Seashell Academy by Suntown Education Centre, we believe that the best way to truly understand scientific concepts is through hands-on investigation. Rather than simply memorizing facts about magnets, students who actively experiment with changing variables develop deeper comprehension and critical thinking skills that extend far beyond the classroom.
This comprehensive guide will walk you through multiple magnet strength investigations, each focusing on different variables you can change and observe. Whether you’re a student preparing for your science practical assessment, a parent supporting home learning, or an educator seeking enrichment activities, these experiments provide valuable learning experiences that make abstract concepts tangible and memorable.
Let’s embark on this magnetic journey together, discovering how small changes can create big differences in results!
Magnet Strength Investigation Guide
Master Variables Through Hands-On Science Experiments
1Understanding the 3 Types of Variables
Independent Variable
What YOU change in the experiment
Dependent Variable
What you MEASURE as a result
Controlled Variables
What you keep THE SAME for fairness
24 Key Experiments to Investigate
Distance
Test 0cm to 5cm spacing
Material Thickness
Try paper, plastic, cardboard
Magnet Size
Compare small to large
Stacking Magnets
Stack 1, 2, 3+ magnets
3Essential Investigation Skills
Repeat 3 Times
Test each variable three times and calculate averages for accuracy
Record Everything
Use tables with clear labels, units, and observations
Fair Testing
Change only ONE variable at a time while keeping others constant
4Key Finding: The Distance Effect
Magnetic Force vs. Distance
0cm
1cm
2cm
3cm
5cm
Average number of paper clips held at each distance
💡Real-World Applications
🔧 Everyday Life
- Refrigerator magnets
- Magnetic phone cases
- Bag clasps & closures
🚀 Technology
- MRI medical machines
- Maglev high-speed trains
- Computer hard drives
Build Confidence Through Hands-On Learning
At Seashell Academy, we nurture scientific curiosity through experiential learning, mind-mapping techniques, and personalized guidance—preparing Primary 4-6 students for both PSLE success and lifelong learning.
What Is Magnet Strength and Why Does It Matter?
Magnet strength refers to the force with which a magnet can attract magnetic materials like iron, steel, nickel, and cobalt. This invisible force, called magnetic force, varies depending on several factors that we can investigate through controlled experiments.
In the Singapore Primary Science curriculum, particularly for Primary 4-6 students, understanding magnet strength helps develop crucial scientific investigation skills. Students learn to identify variables, make predictions, conduct fair tests, and draw evidence-based conclusions—skills that form the foundation of scientific thinking.
The beauty of magnet investigations lies in their immediate, visible results. Unlike some scientific concepts that require complex equipment or microscopic observation, magnet experiments provide instant feedback. You can see paper clips fall, observe how objects move, and count tangible results, making the learning process engaging and confidence-building.
At Seashell Academy, our Programme Philosophy emphasizes this type of experiential learning. When students can touch, manipulate, and observe phenomena firsthand, they develop a genuine love for learning that transforms science from a subject to be memorized into an exciting field of discovery.
Understanding Variables in Science Investigations
Before diving into experiments, it’s essential to understand what variables are and why they matter in scientific investigations. A variable is anything that can change or be changed in an experiment.
The Three Types of Variables
Independent Variable: This is what you deliberately change in your experiment. For example, if you’re testing how distance affects magnet strength, the distance between the magnet and the object is your independent variable.
Dependent Variable: This is what you measure or observe as a result of changing the independent variable. In magnet experiments, this is often the number of paper clips picked up, the distance at which attraction occurs, or whether an object moves.
Controlled Variables: These are all the factors you keep the same to ensure a fair test. If you’re testing distance, you must use the same magnet, the same objects, and conduct the test in the same environment each time.
Understanding these variables is crucial not just for magnet investigations, but for all scientific thinking. This systematic approach to problem-solving is exactly what we emphasize in our Mathematics Programme and Science lessons—teaching students to think logically and approach challenges methodically.
Experiment 1: How Distance Affects Magnet Strength
This fundamental experiment demonstrates one of the most important principles about magnetism: magnetic force decreases as distance increases. It’s an excellent starting point because the results are dramatic and easy to observe.
What You’ll Need
- One bar magnet (same magnet for all trials)
- 20-30 small paper clips
- A ruler marked in centimeters
- A flat, non-magnetic surface (wooden table or plastic tray)
- Notebook and pencil for recording results
Step-by-Step Investigation
1. Set Up Your Investigation Area – Place your flat surface on a stable table and ensure you have good lighting. Clear away any metal objects that might interfere with your experiment.
2. Create Your Testing Distances – Using your ruler, mark out distances of 0 cm (touching), 1 cm, 2 cm, 3 cm, 4 cm, and 5 cm from where you’ll place your magnet. You can use small pieces of tape as markers.
3. Start at Zero Distance – Place your magnet on the surface and touch paper clips directly to it. Count how many paper clips the magnet can hold in a chain. Record this number.
4. Test Each Distance – Move the paper clips to each marked distance (1 cm, 2 cm, etc.) and observe whether the magnet can still attract them. Record your observations at each distance.
5. Repeat for Accuracy – Conduct the experiment three times at each distance and calculate the average. This scientific practice increases the reliability of your results.
What You Should Observe
As distance increases, the magnetic force becomes weaker. At zero distance (touching), you should be able to pick up the most paper clips—perhaps 15-20 depending on your magnet’s strength. At 1 cm, you might pick up 8-12. At 2 cm, perhaps 4-6. By 4-5 cm, most standard bar magnets won’t attract paper clips at all.
This demonstrates the inverse relationship between distance and magnetic force. Understanding relationships between variables is a key skill that appears throughout the Primary Science curriculum and forms the basis of scientific reasoning.
Experiment 2: Testing Different Material Thicknesses
Can magnets work through barriers? This investigation explores how different materials and thicknesses affect magnetic force—a concept that has practical applications from refrigerator magnets to medical imaging equipment.
What You’ll Need
- One bar magnet
- 10 paper clips or a small steel washer
- Various materials: sheets of paper, cardboard, plastic folders, aluminum foil, cloth
- Books of different thicknesses
- Ruler for measuring material thickness
Step-by-Step Investigation
1. Test Different Materials – Place one sheet of paper on your table, put a paper clip on top, and bring your magnet underneath the paper. Observe whether the paper clip moves. Repeat with cardboard, plastic, aluminum foil, and cloth.
2. Increase Thickness Gradually – Start with one sheet of paper, then try two sheets, three sheets, and so on. Record at what thickness the magnetic force can no longer move the paper clip.
3. Test Book Thickness – This is particularly dramatic for demonstrations. Place a paper clip on a table, then stack books until the magnet held above can no longer attract the clip through the books. Measure the total thickness.
4. Compare Different Materials at Same Thickness – Cut materials to the same thickness (for example, 3mm) and test which materials allow magnetic force to pass through most effectively.
5. Create a Results Table – Organize your findings showing material type, thickness, and whether magnetic attraction occurred (Yes/No or Strong/Weak/None).
Understanding Your Results
You’ll discover that magnetic force can pass through non-magnetic materials like paper, plastic, and wood, but the force weakens as material thickness increases. Interestingly, the type of non-magnetic material matters less than its thickness. A thin plastic sheet and a thin paper sheet will have similar effects.
This experiment beautifully demonstrates that magnetic force is invisible but very real. It also shows that while barriers can reduce magnetic effectiveness, they don’t completely block the force unless they’re very thick or made of magnetic materials themselves.
Experiment 3: Comparing Different Magnet Sizes
Does a bigger magnet always mean stronger magnetic force? This investigation challenges students to think critically about the relationship between size and strength—a concept that extends beyond magnetism into many areas of science and daily life.
What You’ll Need
- Magnets of different sizes (try to get bar magnets or disc magnets in small, medium, and large sizes)
- 30-40 paper clips
- Ruler for measuring magnet dimensions
- String or thread (optional, for creating a paper clip chain test)
Step-by-Step Investigation
1. Measure and Record Each Magnet – Before testing, measure the length, width, and thickness of each magnet. Record these dimensions carefully, as they’ll help you analyze your results.
2. Conduct the Paper Clip Chain Test – For each magnet, see how many paper clips it can hold in a vertical chain. Let the first clip attach to the magnet, then clip additional ones to form a chain until the weight causes them to fall. Count and record the maximum number.
3. Test Attraction Distance – Place a paper clip on your table and slowly bring each magnet closer until the clip jumps to the magnet. Measure this distance for each magnet size.
4. Test Lifting Capacity – See how many paper clips each magnet can pick up at once (not in a chain, but in a cluster). Record the maximum for each magnet.
5. Compare and Analyze – Create a chart comparing magnet size (volume or dimensions) against each measure of strength you tested.
What You’ll Discover
Generally, larger magnets contain more magnetic material and exhibit stronger magnetic force. However, the relationship isn’t perfectly linear, and here’s why: magnet strength also depends on the type of magnetic material and how the magnet was manufactured. A small neodymium magnet can be much stronger than a large ceramic magnet.
This is an excellent opportunity to discuss the difference between correlation and causation—a critical thinking skill we emphasize at Seashell Academy. Just because two things often occur together (size and strength) doesn’t mean one always causes the other.
Experiment 4: Stacking Magnets Together
What happens when you combine multiple magnets? This investigation explores whether magnetic force is additive and introduces the concept of magnetic poles and alignment.
What You’ll Need
- 3-5 identical bar magnets or disc magnets
- 30-40 paper clips
- Ruler
- Tape (optional, to secure stacked magnets)
Step-by-Step Investigation
1. Test a Single Magnet Baseline – First, test one magnet to establish your baseline measurement. Count how many paper clips it can hold in a chain and record this number.
2. Stack Two Magnets Properly – This is crucial: ensure the magnets attract each other when stacked (opposite poles together). If they repel, flip one magnet around. Test how many paper clips this combination can hold.
3. Add a Third Magnet – Continue stacking magnets in the proper orientation (attracting, not repelling). Test and record the paper clip capacity each time you add a magnet.
4. Test Incorrect Stacking – Now try an experiment with magnets stacked incorrectly (same poles together, which requires tape to hold them because they repel). Compare the strength of correctly versus incorrectly stacked magnets.
5. Create a Graph – Plot the number of magnets (x-axis) against the number of paper clips held (y-axis). This visual representation helps identify patterns.
Understanding Your Results
When magnets are stacked correctly (opposite poles together), their magnetic force combines, creating a stronger magnetic field. You should notice a significant increase in strength. However, the increase isn’t always perfectly proportional. Two magnets together might hold 1.5 to 1.8 times as many paper clips as one magnet, not exactly double.
When magnets are stacked incorrectly (same poles together), they actually weaken each other or create unpredictable results. This demonstrates the importance of magnetic pole alignment—a concept that appears in Primary 5 and 6 Science examinations.
How to Record and Analyze Your Results
Proper data collection and analysis transform simple activities into genuine scientific investigations. This skill is emphasized throughout the Primary Science curriculum and is essential for practical assessments.
Creating Effective Tables
Every experiment should have a well-organized results table with clearly labeled columns and rows. For the distance experiment, your table might have columns for: Trial Number, Distance (cm), Number of Paper Clips, and Observations. Include space for three trials at each distance and a row for calculating averages.
Tables help organize information systematically and make patterns easier to identify. When students can see all their data in one place, they’re better equipped to draw accurate conclusions.
Drawing Graphs and Charts
Visual representations of data help identify trends that might not be obvious from tables alone. For magnet investigations, line graphs work well for showing how strength changes with distance or thickness. Bar graphs effectively compare the strength of different magnets or different numbers of stacked magnets.
Remember to include titles, label both axes with units, and use consistent scales. These details matter in examinations and demonstrate scientific rigor.
Writing Conclusions Based on Evidence
A strong scientific conclusion answers the investigation question using specific evidence from your results. Instead of writing “bigger magnets are stronger,” a better conclusion would be: “The investigation showed that larger magnets generally produce stronger magnetic force. The large magnet (5cm x 2cm x 1cm) held 18 paper clips on average, while the small magnet (2cm x 1cm x 0.5cm) held only 7 paper clips on average.”
This approach—making claims supported by specific evidence—is fundamental to scientific thinking and critical reasoning. It’s a skill that extends far beyond science into many areas of academic and personal growth.
Real-World Applications of Magnet Strength
Understanding magnet strength isn’t just an academic exercise—it has countless practical applications that students encounter in daily life. Making these connections helps students appreciate why they’re learning these concepts and promotes the real-life application of knowledge that is central to Seashell Academy’s teaching philosophy.
Everyday Applications
Refrigerator Magnets: The experiments on material thickness explain why refrigerator magnets can hold papers to metal doors. The magnet’s force passes through the paper to attract the metal surface beneath.
Magnetic Clasps: Bags, jewelry boxes, and phone cases often use magnetic clasps. Understanding magnet strength helps explain why some clasps are more secure than others—they use stronger magnets or position them closer together.
Magnetic Toys: Building sets with magnetic pieces, magnetic fishing games, and other toys rely on controlled magnet strength. They’re designed so children can easily connect and separate pieces, requiring just the right strength.
Technology and Innovation
Magnetic Resonance Imaging (MRI): These medical machines use extremely powerful magnets to create detailed images of the inside of the human body. The magnets must be strong enough to affect atoms but controlled carefully for safety.
Maglev Trains: Some high-speed trains use magnetic levitation—powerful magnets lift the train above the track, eliminating friction and allowing incredibly fast travel. These trains demonstrate how understanding and controlling magnetic force enables technological advancement.
Data Storage: Hard drives in computers use magnetism to store information. The magnetic fields must be precise and controlled, showing how magnet strength affects technology we use daily.
These real-world connections make learning meaningful and memorable. When students understand how classroom concepts apply to actual innovations and everyday objects, they develop the genuine love for learning that Seashell Academy nurtures in every student.
Common Mistakes to Avoid
Even with the best intentions, students sometimes make errors that affect their experimental results or conclusions. Being aware of these common pitfalls helps ensure accurate, meaningful investigations.
Experimental Design Mistakes
Changing Multiple Variables: The most common error is changing more than one variable at once. If you test different magnets at different distances simultaneously, you won’t know which variable caused the change in results. Always change only the independent variable while keeping everything else constant.
Insufficient Trials: Conducting an experiment only once doesn’t account for random errors or variations. Always perform at least three trials and calculate averages for more reliable results.
Inconsistent Measurement: Using different paper clips, measuring from different points of the magnet, or changing your testing surface between trials introduces uncontrolled variables that compromise your results.
Recording and Analysis Mistakes
Incomplete Data Tables: Forgetting to record units (cm, number of clips), trial numbers, or observations makes it difficult to analyze results accurately later. Record everything during the experiment, not from memory afterward.
Ignoring Unexpected Results: If one trial gives very different results from the others, don’t simply ignore it. Investigate why—was there a measurement error, environmental change, or other factor? Understanding anomalies often leads to deeper learning.
Overgeneralizing Conclusions: If you tested only one type of magnet, you can’t conclude that “all large magnets are stronger than all small magnets.” Limit conclusions to what your specific evidence supports.
Safety Considerations
While magnet experiments are generally safe, keep these precautions in mind:
- Keep strong magnets away from electronic devices, credit cards, and pacemakers
- Small magnets can be choking hazards for young children
- Very strong magnets can pinch skin if they snap together suddenly
- Always use magnets under adult supervision, especially with powerful neodymium magnets
At Seashell Academy, we emphasize that scientific investigation should always prioritize safety alongside learning. Developing good safety habits during primary school establishes practices that will serve students throughout their academic and professional lives.
Connecting Investigations to Examination Success
While hands-on experiments are valuable for understanding concepts, students must also connect this experiential learning to examination formats. Practice questions about magnet investigations frequently appear in Primary 4-6 Science papers, particularly in sections testing experimental design and data analysis.
Common question types include identifying variables, explaining why certain experimental procedures ensure fair testing, interpreting data tables or graphs, and drawing evidence-based conclusions. The hands-on experience from conducting these investigations provides the foundational understanding needed to confidently tackle these examination questions.
This connection between practical experience and examination application exemplifies our approach at Seashell Academy. We don’t just prepare students for PSLE success through rote memorization—we build genuine understanding that naturally translates to examination confidence. Our P4, P5, and P6 Chinese Programmes apply this same philosophy across subjects, ensuring holistic academic development.
Magnet strength investigations offer far more than just scientific knowledge—they develop critical thinking, systematic reasoning, and the confidence to explore the world through experimentation. By changing one variable at a time and carefully observing results, students learn the fundamental principles of scientific inquiry that will serve them throughout their educational journey.
The experiments outlined in this guide—testing distance, material thickness, magnet size, and stacking combinations—cover the essential concepts about magnetism in the Primary Science curriculum. More importantly, they provide engaging, hands-on experiences that transform abstract concepts into tangible understanding.
Remember that true learning happens when students actively investigate rather than passively receive information. When children can touch magnets, count paper clips, measure distances, and discover patterns for themselves, they develop a deep, lasting understanding that no amount of reading or listening can replicate.
At Seashell Academy by Suntown Education Centre, this philosophy of experiential, meaningful learning guides everything we do. Just as a pearl forms gradually within the protective environment of a seashell, genuine understanding and academic confidence develop through nurturing support, engaging methods, and sustainable learning practices.
Whether you’re conducting these experiments at home to supplement school learning or looking for enrichment activities that go beyond textbook knowledge, magnet investigations provide valuable opportunities for discovery, questioning, and scientific growth. The skills developed through these simple experiments—observation, measurement, data analysis, and evidence-based reasoning—are foundational to academic success across all subjects.
Nurture Your Child’s Love for Science at Seashell Academy
Does your child need more than just textbook learning to truly excel in Science? At Seashell Academy by Suntown Education Centre, we combine hands-on experiments, mind-mapping techniques, and gamified learning to make Science engaging and meaningful.
Our experienced MOE-trained educators guide Primary 4-6 students through the Science curriculum using the proven Seashell Method—building both academic excellence and genuine confidence in small, personalized classes.
Discover how we can help your child develop a lasting love for learning.


